Humidity is a critical factor for commercial hydroponics farms as it plays a significant role in plant growth, health, and […]
Yes! Garden Guru store completed 2 successful years today. We are quite happy to share this news with you all. […]
Hope you all had a great new year weekend. Few weeks back, I posted a topic in the forum to […]
This article is a continuation of Part I of Hydroponic Cucumber production. The response to the previous article was […]
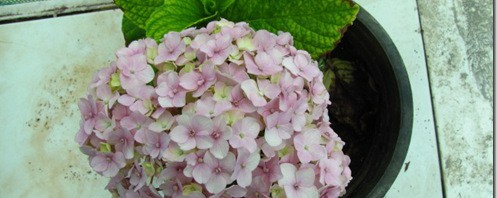
Hydrangea Propagation – How To Propagate Hydrangeas From Cuttings Hydrangea is not quite common here in Bangalore. Very few people […]
There is no count on how many times I have longed to have large space for my garden. Anytime I […]
Ok, Not exactly a greenhouse, but a poor man’s propagation chamber or a cold frame. what ever you want to […]


Recent Comments