I am sure this happens many times in our lives. You go to a nursery or a garden center and see the beautifully grown plants and also colorful seed packets. You say it to your selves “I want a garden just like this”. The plants and the flowers are so pretty that you end up buying a lot of seeds or plants themselves.
You bring the seeds home and you are all set to start your own dream garden. Some of you succeed in that process and come out as “green-thumb” and the rest call themselves “not-a-green-thumb” and move on with their life. Though there are lots of posts in this site that touch upon germination of seeds. I have received lot of requests to write a post exclusively on seed starting procedure.
This post is mainly to ensure everyone gets a green thumb. If you are having the similar issues with starting seeds, this post is for you. If you are already an expert in seed starting, you can also take a look and if possible share some of your best practices. Gardening is one field where the learning never stops.
This article is going to be in series. So hang in there!
Before we actually dive into the process, definition of some terms is in order.
Seed
A seed can be defined in many ways. Seed is a miniature plant, dormant and resting inside a seed coat waiting for a conducive environment to germinate. Once the seed finds the environment favorable, it breaks the seed coat and germinates. This process is germination. It is also called emergence of seed. The phase before germination is pre-emergence and the one that comes after is post-emergence.
Cotyledon
Cotyledon is the first set of leaves that emerges post germination. They are also called the seed leaves. Those leaves don’t actually look like the actual leaves of the plant whose seed it is.
True leaves
True leaves are the set of leaves that emerge after the cotyledon. True leaves resemble the leaf of a particular plant or a variety.
Part I of this post we will discuss on the materials you need to do seed starting and in Part II we shall look at the procedure it self in detail.
For seed starting, we need the following items.
- Seeds
- Seed starting mix
- Container
- Watering can and a Polythene sheet
- Plant labels.,
- Good environment ( Sunlight, temperature, protection etc)
Seeds
Seeds have to be the most important thing is seed sowing or seed starting procedure. It is very important that you select good quality seeds. Seeds must be from a good company. Each variety of seed has its own viability period beyond which their germination rate will come down. But the good thing is that many vegetable seeds stay viable for upto an year and some seeds stay good for almost 5+ years. I sowed a tomato from 5 years back and it came out just fine. 
Selection of seed should also take into consideration the weather condition of the area in which the seeds are sown. If the weather is not suitable for the seed, then germination may not happen. It is better to check the sowing chart for finding out the right vegetable for the season and then get the seeds. Also check for expiry of the seeds. Some seeds lose viability too quickly.
Seed starting mix:
A seed starting mix is simply any substrate or medium that we use to germinate our seeds in. There are countless variety of mixes available for seed starting. My personal favorite is cocopeat. Cocopeat is also known as coir pith or coir peat. This is a byproduct of the coir fiber industry. Cocopeat can be purchased as compressed blocks or lose mix. I prefer compressed blocks since they are easier to handle. Buy cocopeat that is washed and sterilized.
Seeds can be sown in a mix that has just cocopeat. Cocopeat offers no nutrients to the plants. It is important that we pay attention to adding fertilizer after the seed germinates. This can be done using a water soluble fertilizer or by adding some compost to the cocopeat while making the mix. If you want an easier way, you can buy seed starting plugs. Plugs are of so much convenience and they make transplanting a no-brainer.
Care has to be taken that the seed starting mix doesn’t have any fungal infection. Using such a mix will lead to seedling mortality due to damp-off.
Pictured below is a shot of tomato seedlings growing in a mix of cocopeat and perlite.

The following substrates can be used for seed starting.
- Coir Peat ( Washed and sterilized)
- Peat moss (pH balanced)
- Coir Peat and compost ( 50:50)
- Peat + Compost ( 50:50)
- Perlite
- Vermiculite
- Perlite+Vermiculite
- Peat/Coir Peat + Vermiculite+ Perlite (1:1:1)
We will have a separate post just on substrates and their characteristics. For now,read on.
Container
Almost any container can be used. Seedlings don’t have lot of roots. So a shallow container is enough and also is easier to handle. Drainage holes are a must to any container used for seedling production. Root rot, damp-off and other problems arise mainly due to improper drainage.
For small scale germination, one can use any pot/tray or even small cups. Seed starting plugs are a good choice and they make containers unnecessary.
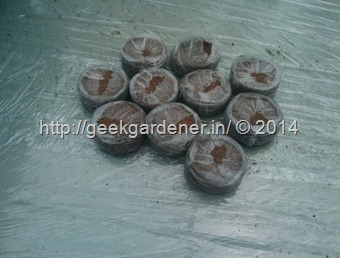
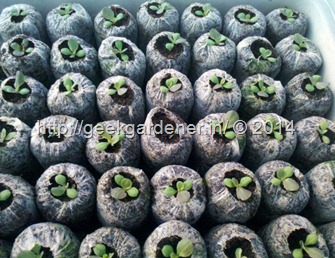
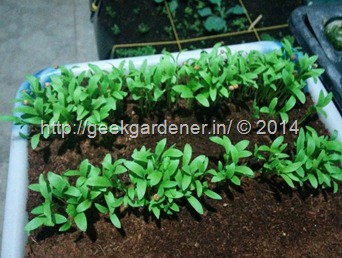
For large scale, you are better of using nursery propagation trays. The trays are filled with cocopeat and the seeds are sown in them.
Here is a video with details on how to start your seeds using Jiffy seed starting plugs.
Polythene sheet.
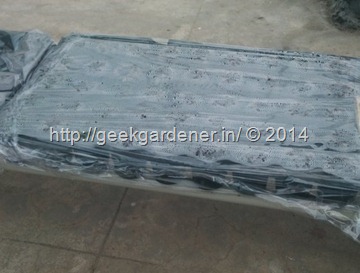
This one is not mandatory but it has time and again proved that covering the seeds during germination increases the humidity and makes the germination happen little sooner. It also keeps the temperature a little higher than outside which the seeds love.
Watering Can
You need a watering can as well water the seedling. It is important that you use a can that has a sprinkler nozzle fit in otherwise you will be hosing the pot and the seeds.. well, trust me..they wont be even there in the pot to germinate.
I will end this part I here and we shall continue on Part II detailing the seed starting procedure. The goal is that after reading these articles you will never have to worry about seed starting.
Until then,
Happy gardening
GG


13 Responses
hi mani, just stumbled upon your site. i have to say it’s really awesome what you’re doing with container gardening. i am a novice gardener. i am orginally from assam and my family has open garden for cultivating vegetables on the ground. however, i live in delhi in a multistoried apartment with only a couple of small balconies. recently i bought some pots for cultivating some plants like lettuce, ‘rai’ in hindi(mustard ?), cilantro, spinach. however, i’m using garden soil instead of potting mix, which i think is difficult to get in delhi. in any case, i used garden soil before i even knew that such a thing as potting mix exists.
anyways, the rai has come up fine and they have sprouted already. but the lettuce and other leaves have not come out at all. i don’t know how to rectify that. i used an organic garden compost purchased from the local nursery. i think the compost is multipurpose with equal parts NPK. but i wonder where i can get fast releasing nitrogen and phosporus liquid fertilizers in delhi or online. some advice would be really helpful and much appreciated. again congrats on such great work and keep it up.
Hi,
you can visit the http://geekgardener.in/forum/new-gardeners/gardening-in-delhi/
you will find the address of the stores in that post.
And if want to try online store there are many but the best i think will be http://www.gardenguru.in/
enjoy gardning
Thanks for a great article. I had requested such an article when I visited your store last Sunday and am thankful you posted this.
Questions:
1. I had sown in a few seeds in a few plastic is containers(cut plastic bottles) I didn’t know about the drainage at all.I have now 2 pots which are quite damp as I had covered them with plastic. What can I do now for these seeds?I have taken off the plastic and kept it in a shaded place so that the dampness can go away. Would th help?
2. 3 pots now show Cotyledons showing growth of about a centimeter. What should I do now? I have now taken off the plastic as I had read it should be taken off at this point.
3. Soaking the seeds in water is a good idea?
4. My earthen pots with plants in them have just 1 hole each. I heard this is not enough. How can we make more holes without breaking the pot.
Thanks for suggesting this post. You are right on removing the polysheet. if there are no drainage holes, please make one with a punch without disturbing the plant. soaking seeds in water is good although it is not necessary for all seeds. you can add some small stones in the bottom of the pot to aid drainage.
Small stones? No No.. I meant there is only 1 whole present in the pot. How can I make new ones without breaking the earthern pot and without the headache of repotting.
May be you can try doing this by using a drill machine or a hand driller.
Regards
[…] How to sow seeds – Part I […]
I stay in Gurgaon
Pl advice where I can get good quality seed for kitchen garden
To planted in pots
thanks for this post
Thank you Sir for your articles on Kitchen Garden. In view of Lack of Space in Multi Storied Apartments, kitchen Garden is a Remote Chance.Bhayya can you provide full Guide on Hydroponic Gardening with full Practical Tips which will be Most useful to the Arban residents, where large output can be achieved with less Space what I know.
Very usefull information for beginner
Where do we gets right quality seed
Pl advice
I stay in Gurgaon
[…] bury the seeds too deep. Correct sowing techniques ensure 100% germination rate. Lettuce seeds needs light to germinate. What I do is, I create a […]